Remove Write Protection From USB Drive and SD card Write Protection
We always need to carry our data from one place to another place we don’t have internet everywhere with us that we can take our files online from the cloud or other online places we always need a USB Drive to carry our files what will happen when your USB Write Protected and how to remove write protection from USB? Don’t worry here we share how to remove USB Write Protection just follow few steps.
Summary:
- cmd as Administrator
- diskpart
- list disk
- select disk 1
- attributes disk
- attributes disk clear read only.
Write Protection Removal Software
The best way to fix Kingston USB flash drive write protected issue is to format the Kingston Flash drive usually. However, this way doesn’t work sometimes, because Windows doesn’t allow formatting the Kinston pen drive at the most times. Is there any other way to realize this write protection removal for Kingston pen drive in Windows 10/8/7.
Related:
How to bypass windows admin password with boot CD or USB
How To Hack WiFi Network Just In One Minutes
Remove write protection from USB Windows 10
Remove USB Write Protected Windows 10 is the same method that you can remove your write protected USB Drive and SD card you need to type some basic commands in the command prompt.
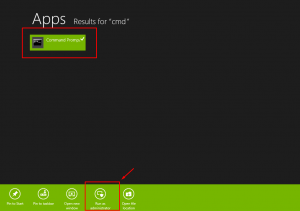
Step 1. open cmd (command prompt) as administrator
Step 2. In command prompt type diskpart and hit enter

Step 3. type list disk and hit Enter
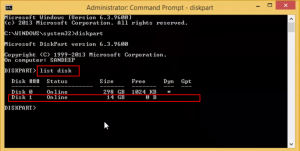
It will show you active disks, recognize your USB by its size
Mine is 16 GB which shows 14GB actually, which is Disk 1
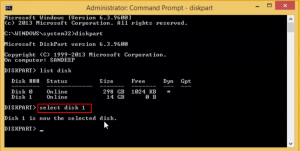
Step 4. type select disk, disk number as select disk 1 hit Enter
Step 5. type attributes disk hit Enter
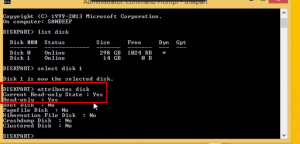
Read-only state is active means disk is USB write protected
If your current Read-only state: yes
You should make the current Read-only state: No
Follow the step 6
Step 6. Type attributes disk clear readonly and hit Enter
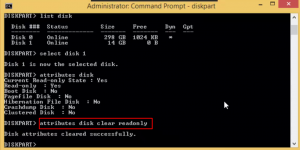
This will remove write protection
Done you did it successfully
Now you can try copy and paste your files
Step 7: Now type Exit from the command prompt
Leaving Diskpart
Done you remove write protection from USB drive
Thank you for visiting our website
How to restore lost capacity and partition of your USB drive and SD Card
Step 1. Click Windows button and R keyword to open Run
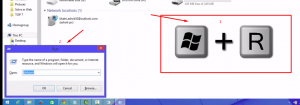
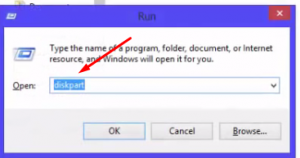
Step 2. Write diskpart in Run to open the C:\windows\system32\diskpart.exe
Step 3. type list disk and hit Enter
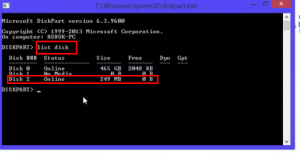
It will show you active disks, recognize your USB or SD Card by its size
Step 4. Type select disk, disk number as select disk 2 hit Enter
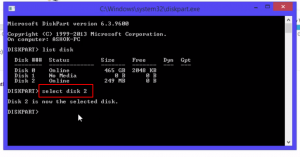
We select our own disk number however it is 0,1,2,3 we select our disk number
Step 5. Type select partition 1 and hit Enter
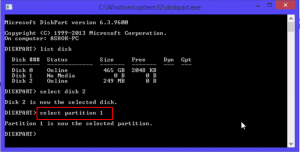
This code will partition your selected disk
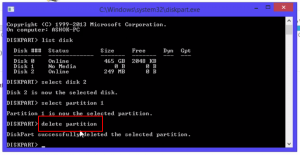
Step 6. Type delete partition and hit Enter
Step 7. Type partition and hit Enter
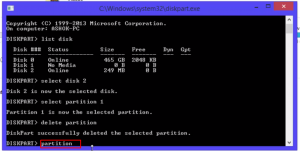
It will show you all the codes
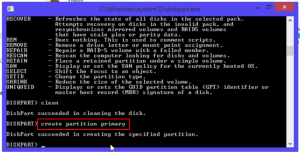
Step 8. Type clean and hit Enter

It will clean your Disk
Step 9. Type create partition primary and hit Enter
Step 10. Type format and hit Enter
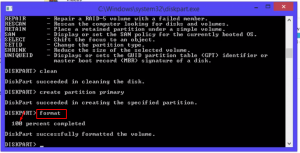
Wait until Complete formatting 100%
Feel free to comment about any problem you face.!

[…] Remove Write Protection From USB Drive and SD card Write Protection […]